# Creating Challenges
“I never teach my pupils; I only attempt to provide the conditions in which they can learn.” –Albert Einstein
“I cannot teach anybody anything, I can only make them think.” –Socrates
This documentation assumes that you are already familiar with authoring regular scenarios, especially the file tree structure with index.json and scenario syntax.
# How a Challenge differs from a Scenario

Think about your experience with learning a new game. A card game, video game, board game, a contest, a sport, what have you. If you have never played the game before, often you'll want an orientation and to try a few dry runs. Hopefully, a mentoring expert will assist you with navigating the flood of new terms, rules, skills, and even some beginning strategies. This is the purpose of Katacoda scenarios with steps.
Once you understand the fundamentals and are successful with a few dry runs, your confidence is up to try a real play of the game. When you play a real game with perhaps some minimal coaching your confidence with the game goes up. The more you practice to better you get and progress from noob to beginner, to novice, and beyond. This is the purpose of challenges with tasks.
Challenges are based on the same Katacoda engine but the way the material is presented and the learner experience is very different. Scenarios teach new concepts, while challenges help tune and strengthen the learner's understanding of concepts. A challenge is another medium for learning. It lets learners try solutions while the challenge engine watches for mistakes then confirms their success. When a learner closes is a successful challenge, and the reality check has been confirmed, there is a natural boost of confidence.
A scenario is a step-by-step, interactive lesson on new concepts to solve a real-world problem.
A challenge is an opportunity for learners to solve a real problem by themselves, helping them gain a deeper understanding of how to apply a given tool or approach.
As such, challenges don’t contain an instructional lesson text, but instead, present tasks to be completed. As the learner completes each task, the session provides real-time feedback to encourage the learner to keep making progress. Through an on-demand reveal action, the challenge provides hints to assist the learner when they get stuck.
# Example Challenges
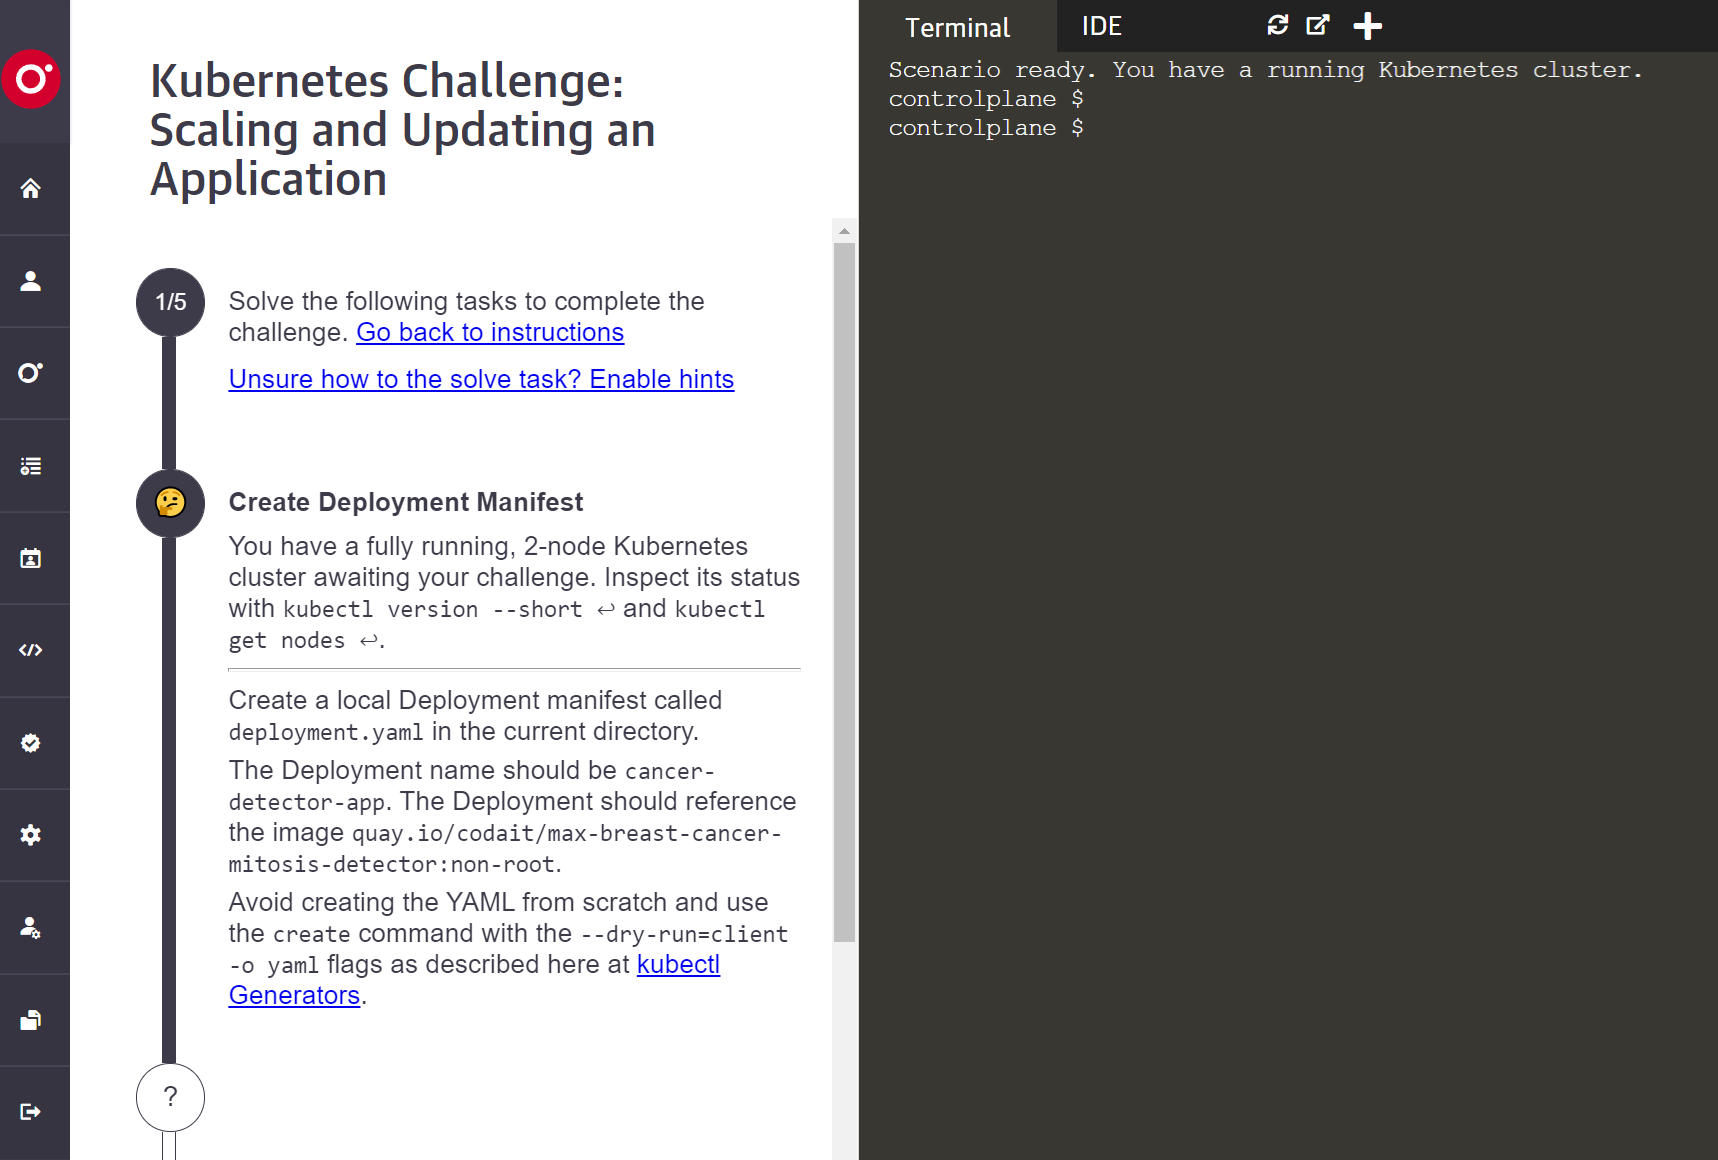
The challenges shown to learners looks like this:
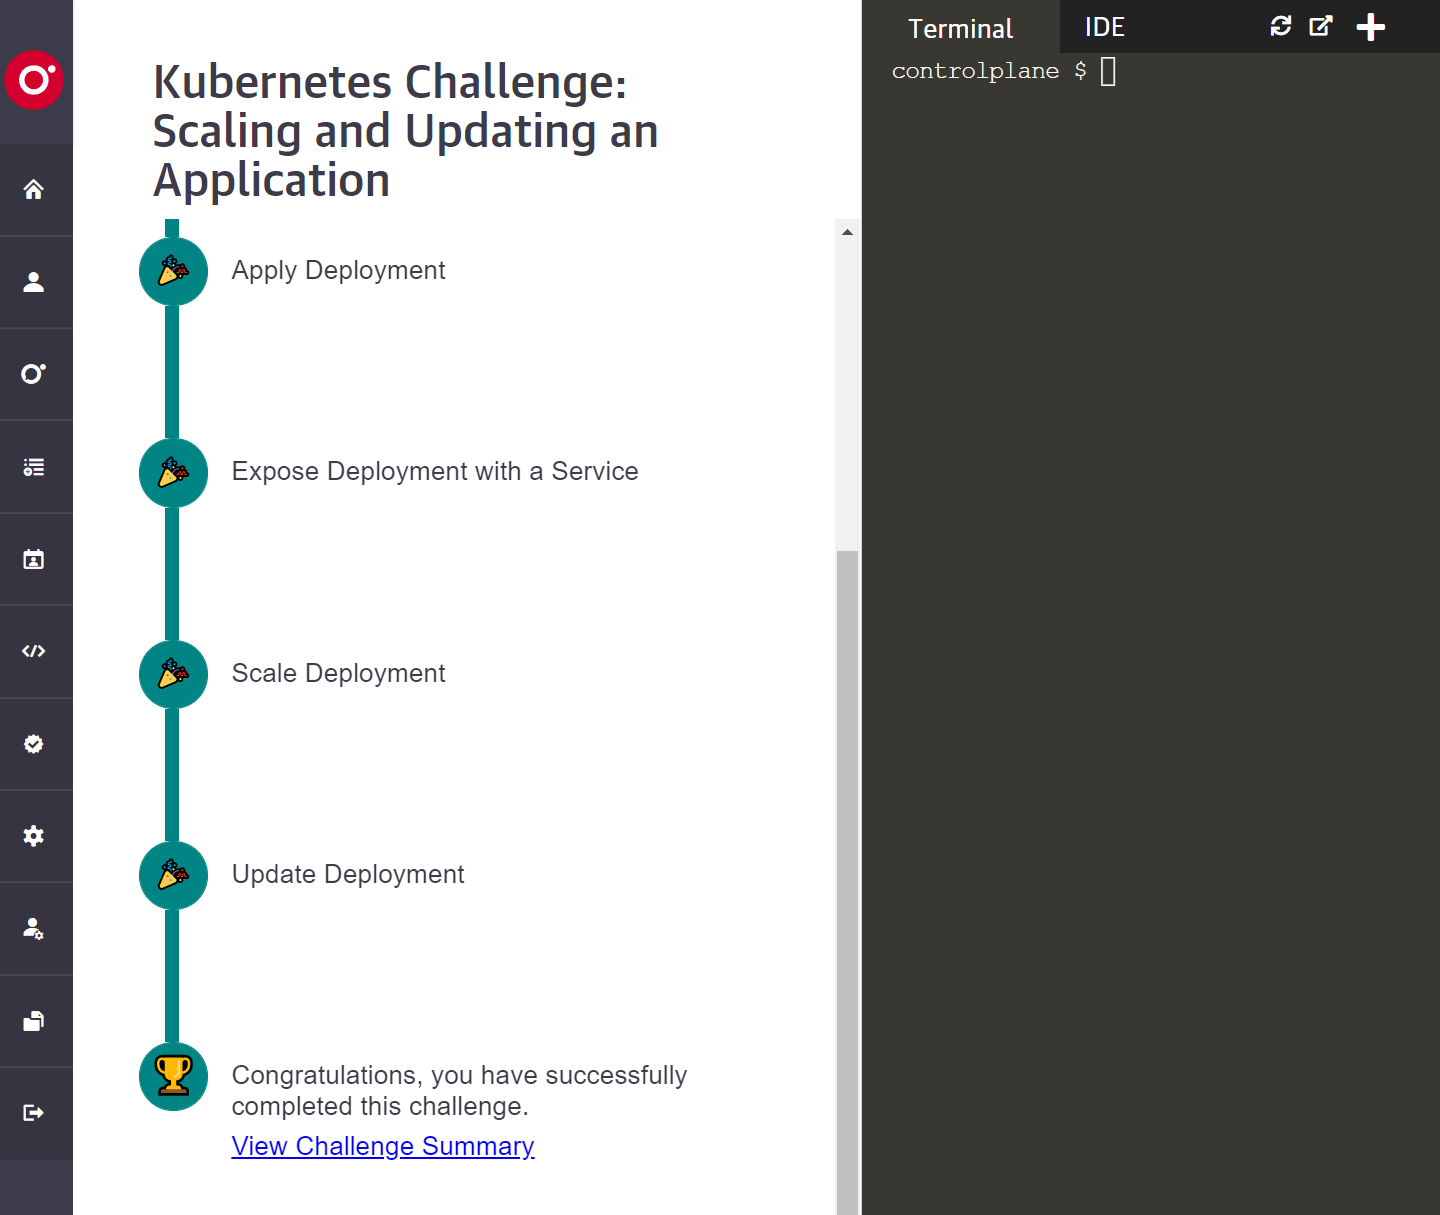
Once the learner has completed all the tasks, they can go back and review a task's details by clicking its title.
Here is a live challenge with its source code:
- Live example challenges:
https://katacoda.com/scenario-examples/courses/challenges - Source files:
https://github.com/katacoda/scenario-examples/tree/main/challenges
To get started, you can clone this above challenge as a template.
Here are some additional challenge examples in O'Reilly's learning platform:
Challenge: Kubernetes Challenge: Scaling and Updating an Application
Challenge: Kubernetes Challenge: Assembling a Multi-Component Application
Compare these to a regular scenario:
# Authoring a Challenge
Challenges, despite the name, shouldn't necessarily be “challenging” — in the sense of being difficult. Someone who has already learned the necessary skills should be able to easily complete the corresponding challenge.
The authoring responsibilities for a challenge are more extensive than a regular scenario. For a scenario, you write a markdown file for each step. Challenges call these tasks, instead of steps. For a challenge, you compose the following for each task:
- Task markdown
- Task verifications
- Task hints
# Task Markdown
The style of writing tasks for challenges is different than the steps for scenarios. The tasks should be short concise requests to the learners with the details necessary for the verifications to pass. The authoring trick is to provide enough instructions to meet the goal, without telling the learner how to implement the solutions. The hints can also give further details, but should also avoid the full reveal. Each task is written as a request and it assumes the learner has the fundamental skills to carry out the request. The task should just ask for the "what", and not show the "how".
As an example, in a scenario step, you might be writing the teaching moment as:
Use this
touch foo.jsoncommand to create a file. Take theexample jsonfile from the project documentation in the examples directory and change the value for the dimension from 2D to 3D. When you are done editing the file check the syntax with this linterjsonlint foo.json. Once valid, apply this file to the widget withmycli apply foo.json bar.
In a skill challenge, you assume that the learner understands all the mechanics. So take this style instead:
You want the widget
barto take on a 3D configuration. Create a declaration calledfoo.jsonand apply it to widgetbar.
In the scenario step, the markdown would most likely be more verbose with links to examples and an explanation of the JSON file, and what widgets and other terms are all about. The challenge task instruction tends to be much more reserved in providing background information. The step instruction is just providing the minimal facts. In this case, the verification is expecting a file called foo.bar. We need this file name to help the validator know the file to validate. We also need to know the name of the widget in the case where the problem space can have multiple named widgets. You are giving the learner the space to try, fail, and succeed. However, the space is guarded with rails such as the name of the widget and the name and type of the file.
The syntax for the markdown for challenge tasks and hints is mostly the same as the markdown syntax for scenarios. The markdown and its special extensions for scenarios are covered in Authoring Katacoda Scenarios.
Challenges do not support these special markdown extensions in the tasks and hints instructions:
| Extension | Scenario | Challenge |
|---|---|---|
| execute | ✓ | 🗴 |
| interrupt | ✓ | 🗴 |
| copy | ✓ | 🗴 |
| open | ✓ | 🗴 |
In challenges, in the intro and finish pages, the standard markdown is supported. The markdown extensions in these pages do not apply in those contexts.
The use of images in the intro and finish pages are defined the same with a single relative dot (.) reference to the assets directory such as ./assets/cat.png. However, in the challenge tasks and hint use the double dot (..) ../assets/dog.png.
# Layouts for Challenges
Authors are encouraged to use the common and clean layout of just "uilayout": "terminal" and if the learner will be asked to manipulate and edit files, embed the VSCode IDE with "showide": true. Here is a typical environment:
  "environment": {
    "showide": true,
    "hidesidebar": true,
    "uilayout": "terminal"
  },
# Verifications
A key to successful challenges is detailed verifications. When a learner is presented with a task, the challenge engine is continuously calling a verification script and watching for a return code of zero (no error).
Some tasks can be simple such as:
Create a file called
foo.jsonin the current directory.
The solution for that instruction would be a simple touch command and the verification is a just test -f foo.json. However, the reality is most of your steps involve a sub-series of other micro-validations. A more realistic step would be:
Create a JSON file in the current directory with the name
foo. Ensure the JSON follows the correct schema for creating the widget name my-widget with a mode ofenhanced.
This is a distinct task in the challenge, but it involves creating a file in a valid form. As an author, if your verification script just checked for the presence of the file, you would be missing so many other verifications that the learner can still get wrong. In this example, to follow a real-world situation, you would validate for:
✔ presence of file name in the current directory
✔ valid JSON syntax
✔ valid schema for a widget
✔ valid value settings for the widget parameters
Some verifications can involve a dozen checks. If you are finding there are too many verifications, then consider breaking your task into two tasks and find better delineations between the two tasks. If you find the verification is too simple, then perhaps what your asking the learner to do is not challenging enough.
Keep in mind that the results of the verifications have a direct correlation to the hints you provide. The better your verifications, the better your hints. If each verification fails to return a unique error code, then you can map each error code to a hint.
# Hints
As an author, you assume that the learner has some level of skill to interpret your instructions and attempt the solution to the task. However, the visiting learners will come from a wide spectrum of experiences. For some learners, your instructions will be unclear and misinterpreted. Sometimes even the most experienced will trip upon an overlooked syntax mistake. For whatever reason, learners will sometimes get stuck. While we want to challenge learners, our goal is to ensure they leave the scenario with a feeling of success and not a personal failure. At the learner's discretion, a hint can be revealed.
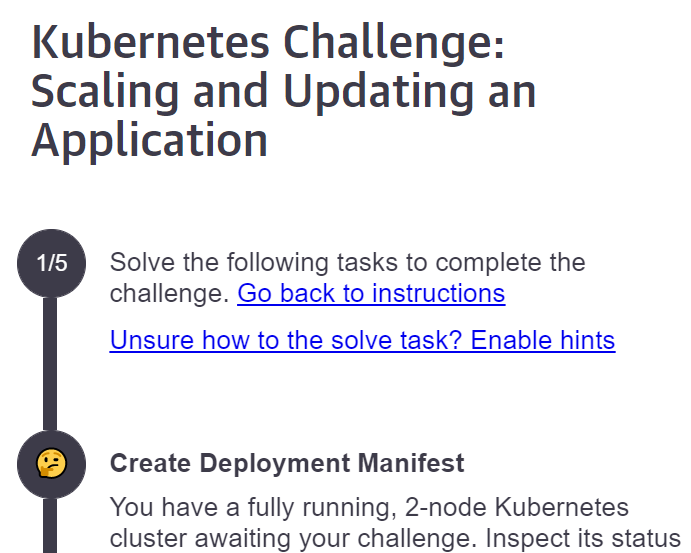
At the top of the challenge step instructions, there is an action to enable and disable these reveals.
The hints are not to be the full disclosure of how to solve the problem. The best hints are the ones that inspect the current state and context of the artifacts being worked on and look for common problems. For instance, if the task you instructed to edit a JSON file, you will want to run a JSON validator tool against the expected file name. The hint can reveal something like, "we see that you have edited the JSON file foo.json, but you lo need to ensure it's syntactically correct." If you know the schema of the JSON, then you can further check the validity of the data and structure in the JSON. Good contextual validations directly produce very pointed hints for the learners.
As an author writing good verifications for each hint is important. As you can see it can be time-consuming to write and test the validation logic. You want to make the step instruction fairly precise to make sure the learner performs the solutions in some predictable path. In the above example with foo.json, the step instruction should be clear that you are expecting the learner to edit or create a specific file name at a specific location with a specific format. These specifics make it easier to watch and validate the learner's progress. If there are several ways learners can solve a problem and you only validate for one path then the learner could be in a situation where they did the correct thing, yet your validations and hints are inadequate and the step never passes. This can often happen when subject matter experts try the challenges and they solve the steps through alternative, clever, or non-traditional pathways.
In a challenge, the sidebar can also provide hints is the learner feels stuck. Hints should merely nudge the learner in the right direction, not provide a definitive answer or solution (the how) to the task.
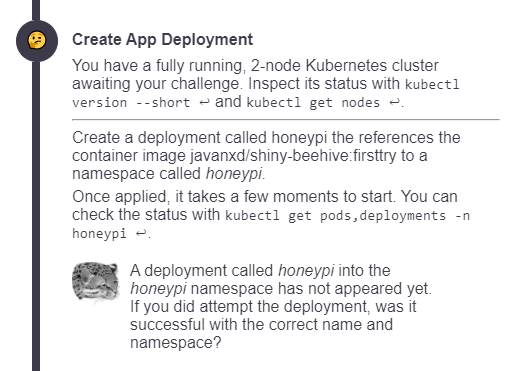
This first example shows the first task in a challenge. It starts with a brief description of the running environment then asks the learner to create a deployment. Creating a deployment involves several micro-tasks. The first thing that must be done is to create a namespace. While that would be a confusing request for someone new, the task assumes the learner fundamentally knows how to create a namespace. It's also the first thing that needs to be done, and it's the first verification. By turning on hints, the verification for the namespace is failing, and therefore the hint reveals the problem. Notice the hint does not provide the "how" solution. If this was a tougher ask, the author could provide a link to some documentation on how to create a namespace.
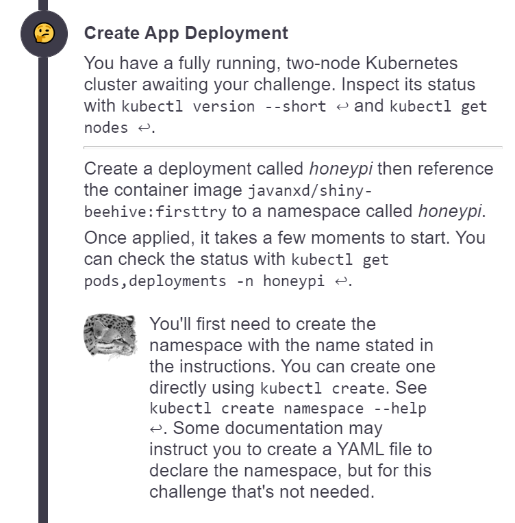
Once the learner creates the namespace, the task is not done, just that portion of the validation has passed. The next validation in this step is looking for a deployment in that namespace, as per the instructions.
Once all the validations for this task are satisfied, the challenge engine will progress to the next step.
Completability is essential to how challenges function as learning tools: If the learner can complete all the tasks, then they know they have learned those skills. (Hooray!) If they cannot complete the tasks or experience trouble along the way, then they know they need to resume studying and practicing.
The hint text can be used to point learners back to relevant instructional resources. For example, "Don't recall the command for initializing a new server? Revisit Chapter 3 in Servers & Widgets." We do not want learners to get stuck in a dead-end; we always want to help provide a path forward, especially when things "aren't working."
💡 Tip: Because hints are a specific feature in challenges, avoid using the word hint when providing advice or additional guidance. Instead, consider some better guidance terms such as tip, advise, try using.
# Reconfiguring a Scenario as a Challenge
To convert an existing scenario to a challenge:
# 1. Specify the challenge version.
Add "type": "[email protected]" to the top of the index.json file, as in this example source.
{
    "type": "[email protected]",
    "title": "Challenge Template",
    "description": "Basic template for a challenge",
    …
This tells Katacoda that the session will be a challenge, as well as which version of the challenge API to use.
⚠️ At the moment, the only valid challenge type version is 0.8.
# 2. Specify a verification script for each task.
While regular scenarios have "steps," the challenges API interprets steps as "tasks." Your index.json should continue to specify an array of steps (tasks), but you will need to specify a verify and hint script for each step. Here is an example source:
{
    "type": "[email protected]",
    "title": "Challenge Template",
    "description": "Canonical template for a challenge",
    "difficulty": "Beginner",
    "time": "5 minutes",
    "details": {
        "steps": [
            {
                "title": "Bananas",
                "text": "task_1.md",
                "verify": "verify_1.sh",  // <-- New
                "hint": "hint_1.sh"       // <-- New
            },
            {
                "title": "Apples",
                "text": "task_2.md",
                "verify": "verify_2.sh",  // <-- New
                "hint": "hint_2.sh"       // <-- New
            }
        ],
# 3. Update each title and text value.
The title should briefly summarize the task goal at hand. Lead with the verb, indicating the action to be taken. For example:
- Create a new .config file
- Increase the widget capacity
Refrain from putting the actual step number in the title, since the actual number is unimportant information to the learner.
The text property points to a Markdown .md file, which will provide a more detailed prompt for the task. Keep these brief, while providing any specifics needed to complete the task successfully, without telling the learner exactly how to do it. For example:
- Be sure the new .config file is in the default app directory.
- Update the cluster settings to ensure at least 100 additional widgets can be accommodated.
# 3. Write a verification script for each task.
The verify property points to a Bash shell script .sh file. This script is evaluated continuously in the background until it returns an exit code of zero (success), at which point the task is flagged as completed, and the challenge proceeds to display the next task. There are no parameters passed to the verification script, and the script is expected to return the standard zero for success or non-zero for failure.
While testing, it can be convenient to manually run any verification scripts in the foreground, to ensure you get the expected exit code. Note that in Bash, you can check the exit code of the most recently run command by typing echo $?.
For example, if bananas.txt doesn't exist, this set the exit code to 1 (no success):
$ test -f ./bananas.txt
$ echo $?
1
As soon as we create bananas.txt, the next time the verification test is run, it will pass, returning an exit code of zero (success):
$ touch bananas.txt
$ test -f ./bananas.txt; echo $?
0
There is a few seconds of delay built into the verification loop. Your verification functions must be non-blocking. If you call a function that blocks, make sure there is a timeout around the call to ensure it does not block indefinitely.
Note: bash expects .sh scripts to begin with #!/bin/bash. Make sure to follow that convention when saving your verification script into its own .sh file, as in:
#!/bin/bash

test -f /root/bananas.txt
# Simple or Complex Tests
Your test commands can be something simple, like checking for the presence of a file, or more complex, like executing a more elaborate .sh script that, in turn, runs other commands (such as regular expressions matching or test suites), as needed.
You are free to implement the verification logic in any language from natively within the script, to calling out to Python, Go, Node.js, or any other language, script, or tool to perform the verification. For most purposes, native Bash script commands directly in the verification script are sufficient.
This verification test logic is similar to Katacoda's "Verified Steps" feature:
- Example scenario: https://katacoda.com/scenario-examples/scenarios/verified-steps
- Example source: https://github.com/katacoda/scenario-examples/tree/main/verified-steps
# Verification Test Commands Run Continuously
Your test command will be auto-executed about once per second. For quick-to-execute tests, this works well! Something slower — like compiling an entire application — will introduce delay to the UI.
For example, if the test command recompiles the learner's program, and that process takes ~30 seconds to execute, then there will be a delay of at least 30 seconds before the learner is told that they completed the task. Avoid verification functions that are blocking or lack timeout options.
We realize this is not ideal. For now, faster-to-execute tests are better. In the future, we may introduce an option to "click to verify", so instead of auto-running the test command repeatedly, we only run it when the learner has indicated they think they are done with the task (just as with our existing "Verified Steps" feature).
# 4. Define Hints
The hint property points to a Bash shell script .sh file.
Hints are useful to provide learners with an indication of how to unblock themselves if they appear to be taking a long time or have missed something in their solution which is stopping them from proceeding.
As the hint scripts are run within the environment, they can fully inspect and interact with the state of the environment and provide learners with targeted contextually related information. For example, if the task is to deploy an application to Kubernetes, you can inspect if the learner has deployed an app but made a mistake with the Container Image used. A hint can be used to prompt the learner to fix the Image name before they can continue.
An example of a Hint script is below. This prompts the learner after 5 seconds that a Hint will soon be displayed. After 10 seconds, it indicates to use cURL.
seconds_sofar=$1

echo "Debug Hint Task 1: $seconds_sofar"

if [[ $seconds_sofar -ge 5 &&  $seconds_sofar -lt 10 ]]; then
  echo "Keep going, a hint will be shown soon..."
fi

if [ $seconds_sofar -ge 10 ]; then
  echo "Hint: try running the command:"
  echo "curl node01:30080"
fi
# File Name Conventions
We strongly recommend numbering all task-related files. For example:
hint_1.shhint_2.shtask_1.mdtask_2.mdverify_1.shverify_2.sh
This example shows the numbers as postfixes causing each type to be grouped when the files are alphabetically sorted. You can also prefix the files with the number that sorts and groups by the step number.
# Recommended Solver Utility
The above instructions for the tasks, verifications and hints are the fundamentals hooks for the challenge engine. To help make authoring easier an optional Solver utility is provided and you are encouraged to use it.
# Challenges of Challenges
Writing quality challenges that your learners appreciate can be, well, challenging. Challenges are a different writing style from the more straightforward tutorial models with standard scenarios. Challenges ask more from you as an author such as:
- Precisely worded tasks
- Verification scripts that are contextually aware
- Tracking learner progress
- Anticipating learners deviating from happy-path
- Contextually sensitive hints that guide and teach without fully revealing the whole solution
- Solution instructions to help test and produce as you develop and maintain the challenge
- Manual and automated testing
Before publishing your challenge, consider this quality must-have checklist:
☐ Use the latest challenge version with "type": "[email protected]".
☐ Verify title and description.
☐ Verify intro and finish pages.
☐ Ensure in index.json there is a correct "title", "text", "verify" and "hint" for each step.
☐ Ensure there is valid step_n.md, verify_n.sh, and hint_n.sh file for each step.
☐ Run linters for index.json, markdown, [shellcheck](ShellCheck – shell script analysis tool) for .sh scripts, spelling and grammar checkers, and other linting tools that can verify other assets.
☐ Ensure each step asks for a clear, measurable goal, but does not describe how the goal should be achieved.
☐ Ensure each verification is precise. A goal can have multiple verifications and hints.
☐ For each step, be sure there are no other ways a learner can achieve the goal without your verification picking up the valid state.
☐ Scenarios often break later when 3rd part dependencies are missing precise versions or use "latest". Ensure dependent versions are fixed.
☐ Ask another person familiar with the technology to review the challenge.
☐ Other producers need to quickly verify the challenge without being subject experts, so ensure a solutions.md and readme.md file has been provided.
As always, we appreciate your feedback on how we can make this an easier process for you.